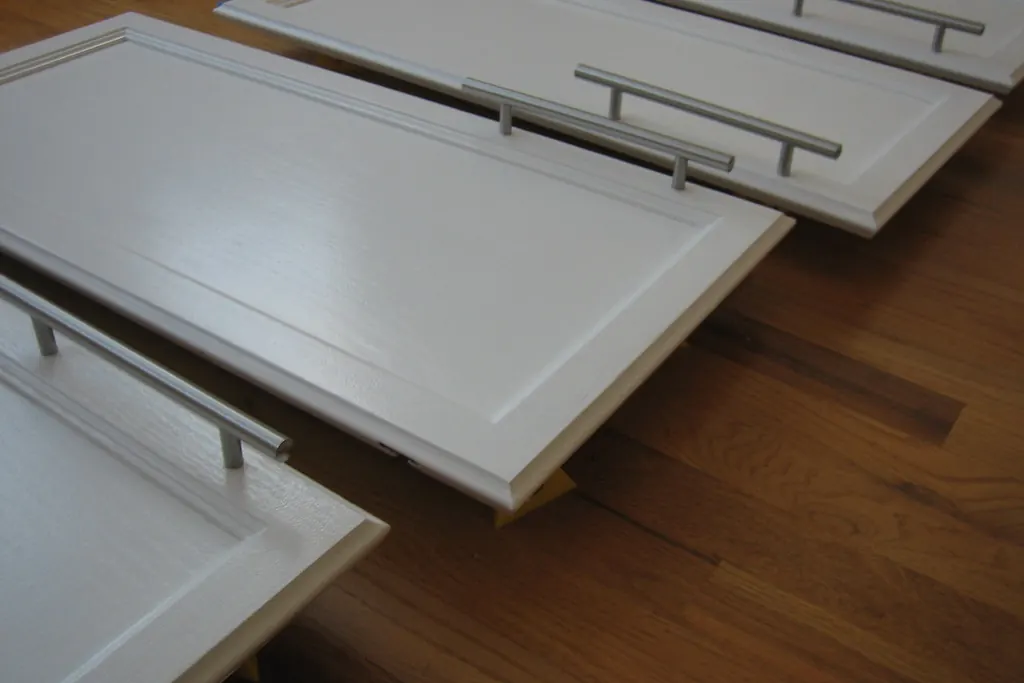
Doors are sized from the openings, not from the old doors
A replacement door is calculated from the cabinet opening plus the overlay, which is why the survey measures boxes rather than doors. An existing door is an unreliable pattern: it may have swollen, it may have been trimmed on site to clear something, it may be hung on a hinge with a different overlay from the one beside it, and a great many kitchens contain at least one door that was replaced at some point and is already slightly wrong.
That matters more than it sounds, because door sizing errors are cumulative and visible. A kitchen where every door is a sixteenth of an inch oversize looks like a kitchen where the gaps are inconsistent, and the eye picks that up from across a room without being able to say why. Measuring the openings, deciding the overlay explicitly and calculating from there is the entire method.
Overlay, properly explained
Overlay is how much of the cabinet face the door covers, and it is the specification most often missing from a quote. There are three arrangements and they are not interchangeable.
| Arrangement | What you see | Cost and tolerance |
|---|---|---|
| Full overlay | Doors almost touching, very little frame visible | Standard cost, forgiving of a frame that is slightly off |
| Partial overlay | A visible band of frame around every door | Cheapest, most forgiving, reads as more traditional |
| Inset | Doors flush within the frame, frame visible all round | Most expensive, least forgiving, needs a true carcass |
Inset doors are the reason some quotes are much higher than others for the same kitchen. The reveal around an inset door has to be even on all four sides and stay even, which requires both a carcass that is genuinely square and doors that are dimensionally stable.
The practical consequence for a replacement job is that the overlay you already have constrains what you can change to. Going from partial to full overlay is usually straightforward, because the new door is simply bigger. Going to inset on existing boxes is frequently not possible at all, because inset needs a face frame that is square and a carcass that has not moved, and thirty-year-old boxes often fail one or both tests.
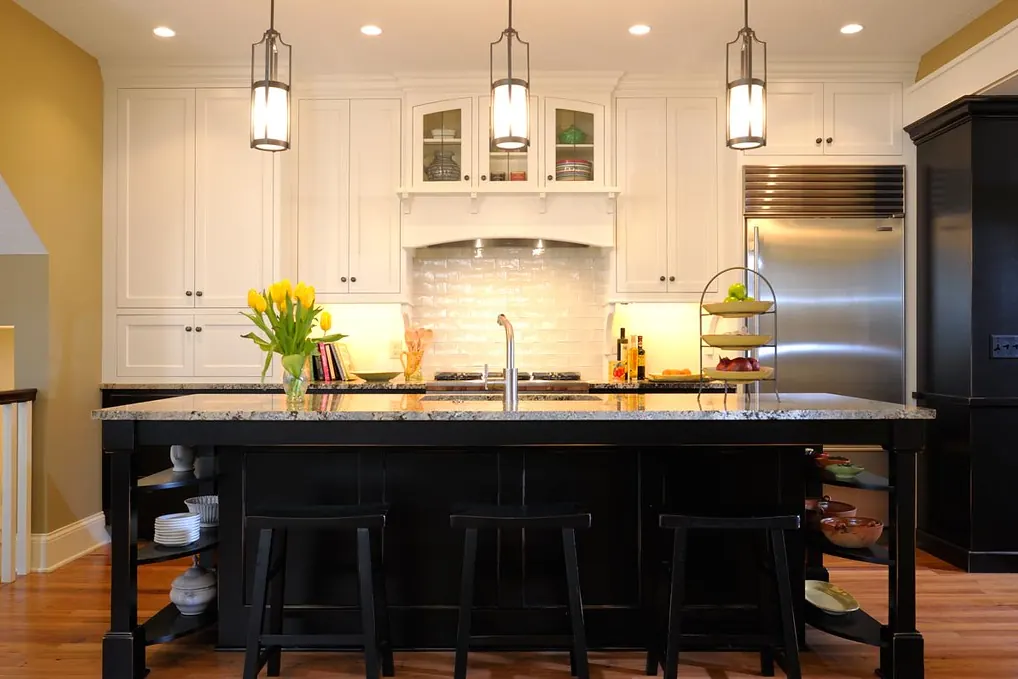
Why a panel has to float
A stile and rail door must let its panel move, and the standard way to do that is a cope-and-stick joint with the panel sitting free in a groove rather than glued into it. This is not a refinement. Wood changes dimension across its width as moisture changes, and a panel that is fixed at both edges has nowhere to put that movement except into the joint or into itself, which is why fixed-panel doors crack.
The amount of movement involved is measurable. The USDA Forest Products Laboratory publishes a dimensional change coefficient for each species, and the nearest weather station it lists to San Clemente is Los Angeles, whose equilibrium moisture content runs from 9.4 percent in January to 11.7 percent in June, a 2.3 point band. Across a 24 inch panel, that swing moves sugar pine about an eighth of an inch and white oak about a fifth. Small numbers, but entirely sufficient to split a glued joint over a few seasons.
A slab door in MDF sidesteps the issue completely, because MDF has no grain direction and does not move in the same way. That is a genuine advantage of MDF for painted doors and one of the main reasons painted kitchens so often use it. The wood species guide has the full coefficient table and the arithmetic.
Door styles, briefly
There are six families in common use and the choice is aesthetic, budgetary and practical in roughly that order.
Slab
One flat panel, no frame. Cheapest to make, easiest to clean because there is nowhere for anything to collect, and entirely dependent on the material and the finish for its character. In MDF with a good sprayed finish it is a legitimate high-end choice, not a budget one.
Shaker
A flat recessed panel in a plain square frame. The most requested style in this market by a wide margin, and it survives fashion better than most because it has almost no ornament to date. The corner where the panel meets the frame is the one place it collects dust.
Recessed and raised panel
A raised panel is machined so the centre stands proud with a profiled edge; recessed panel is flat like shaker but with a moulded inner edge to the frame. Both have more machining in them and cost accordingly. Raised panel with an arched top rail is the signature of a great many 1980s and 1990s kitchens in the hillside parts of San Clemente.
Mullion and louvre
Mullion doors carry glass divided by bars and are used sparingly, usually on one or two display cabinets. Louvre doors are slatted, which makes them the right answer for anything that needs ventilation and the wrong answer for anything that needs cleaning. The door styles guide goes through all six in detail.
Drawer fronts, which are not just short doors
A drawer front is a separate component from the drawer box behind it, and that separation is what allows a front to be adjusted after fitting. On a well-made drawer the front is fixed to the box through slotted holes or adjustable fittings, so it can be nudged into alignment with its neighbours once everything is in. A front screwed rigidly to a box has to be right first time and usually is not.
The other point about fronts is the false front at a sink base. The panel above a sink is a dummy, because the bowl occupies the space a drawer would need, and it can either be fixed or hinged to reveal a shallow tray for sponges and brushes. The hinged version costs very little more and is one of the small details people notice.
How doors and drawer fronts are actually tested, in published numbers
A certified cabinet door is put through 25,000 open and close cycles and a 65 pound racking load before it is allowed to carry the label, and the published test suite is the most useful thing you can read before choosing between door constructions. ANSI/KCMA A161.1-2022, the American National Standard behind the Kitchen Cabinet Manufacturers Association certification programme, sets out the tests and the pass criteria in numbers. KCMA states on its own certification page that a certified cabinet has “passed 14 rigorous tests, including a 600-pound load test, to simulate a lifetime of use,” and, more usefully, that “Between 40% and 50% of cabinets fail their first certification attempt.”
| Clause | Test | Requirement or pass criterion |
|---|---|---|
| §5.5 | Door impact | 10 lb sandbag dropped 12 in. onto a closed door, then again with the door 45° open |
| §6.1 | Door racking and hinge loading | Door at 90°, 65 lb applied 10 in. from hinge centre (32.5 lb each side), 10 cycles 90° to 20° to 90°, weighted 10 minutes; set at point M not more than 0.065 in. |
| §6.2 | Door operation | 25,000 cycles at 20 ±2 per minute through a full 90° swing with the catch engaging; sag not more than 0.065 in. |
| §7.1 | Drawer operation | Loaded to 15 lb/ft², 25,000 cycles to two thirds extension at 20 per minute, and must remain operable while still loaded |
| §7.2 | Drawer closing impact | 3 lb steel ball dropped 8 in. onto the loading bars, 10 times |
| §5.4 | Shelf, bottom and drawer bottom impact | 3 lb steel ball dropped 6 in. onto shelves, bottoms and the exposed part of a drawer bottom |
Clause numbers and figures read at source in ANSI/KCMA A161.1-2022, published by the Kitchen Cabinet Manufacturers Association.
The 0.065 inch sag limit in §6.1 and §6.2 is the figure worth carrying around, because it is the number that separates a door that still looks right in ten years from one that does not. Sixty five thousandths of an inch is about the thickness of a stack of twenty sheets of paper, and that is the total permitted droop at the far corner of a door after ten cycles under a 65 pound load, or after 25,000 ordinary cycles. A door that sags visibly is not slightly out of adjustment. It is far outside what the standard permits, and the usual cause is a hinge or a screw fixing rather than the door itself.
The finish tests, which is where door construction shows its hand
The single most revealing clause in the standard for a door buyer is §9.5, the detergent and water test, because the pass criterion changes with how the door edge is made. A161.1 stands the door edge on a cellulose sponge in a 0.5 percent by weight dishwashing detergent solution and requires no delamination or swelling. For doors with no splice or seam touching the sponge, meaning solid wood stained or painted, the exposure is 24 hours. Where a splice or seam does touch the sponge, meaning edgebanded panels and rigid thermofoil, the exposure is 4 hours. That is a six to one difference in the tested exposure, written into the standard, and it is the clearest published statement anywhere of why an edge detail matters more than the face of a door.
| Clause | Test | Detail |
|---|---|---|
| §9.1 | Ageing before any finish test | All finish tests are run on new surfaces only after the finish has aged a minimum of 10 days |
| §9.2 | Shrinkage and heat | 24 hours at 120 °F ±5 and 70 percent ±5 relative humidity, with no discolouration, blistering or checking |
| §9.3 | Hot and cold check | 5 cycles of 1 hour at 120 °F and 70 percent RH, half an hour at room temperature, then 1 hour at minus 5 °F ±5 |
| §9.4 | Chemical resistance | 1 cc ±0.5 each of lemon, orange and grape juice, ketchup, coffee at 115 °F, vinegar, olive oil, 100-proof alcohol and detergent solution for 24 hours on door, face frame, drawer front and drawer side, mustard observed at 1 hour |
| §9.5 | Detergent and water | Door edge on a cellulose sponge in 0.5 percent detergent solution: 24 hours where no splice or seam touches the sponge, 4 hours where one does |
The §9.2 and §9.3 conditions are worth reading twice on this coast: the heat test runs at 70 percent relative humidity, which is a normal San Clemente number rather than an extreme one.
Two of those tests carry a specifically local reading. §9.2 runs at 120 degrees Fahrenheit and 70 percent relative humidity for 24 hours, and §9.3 cycles between 120 degrees at 70 percent humidity and minus 5 degrees. The humidity figure in both is not a stress condition in San Clemente, it is an ordinary marine layer morning, which is a good argument for asking whether a door has actually been tested rather than assuming. The minus 5 degree leg, on the other hand, is a condition this city will never see, so a door that fails only there is failing a test that does not describe your kitchen.
The appearance clause, §8.1, is the one that explains a line item people query on quotes. It requires exterior exposed surfaces to be free of saw marks and either filled and sanded or edge banded, and states that sides need not be finished on individual units, but that exposed sides as installed must be factory finished or covered with factory-finished panels in the field. It also allows a toe kick to be unfinished provided it is covered or finished in the field, and requires interior exposed surfaces to carry a decorative film or paper or at least one coat of clear or pigmented finish. That is the published basis for finished end panels appearing as a separate charge: the standard treats them as a field-fitted item, not as part of the box.
Which doors are actually on San Clemente kitchens, by era
Roughly four out of ten San Clemente kitchens were built between 1970 and 1989, which is why partial overlay raised panel doors on face frame boxes are the single most common thing we are asked to replace in this city. The distribution is published. The SCAG Pre-Certified Local Housing Data prepared for the City’s 6th Cycle Housing Element Update, drawing on American Community Survey 2014-2018 five year estimates, records San Clemente’s housing units by year structure built as 1.5 percent in 1939 and earlier, 2.5 percent 1940-1949, 7.9 percent 1950-1959, 15.2 percent 1960-1969, 21.7 percent 1970-1979, 19.4 percent 1980-1989, 10.8 percent 1990-1999, 19.2 percent 2000-2009, 0.8 percent 2010-2013 and 0.9 percent 2014 and later, against a total of 26,573 housing units.
| Era | Share of San Clemente units | What the doors are, and what replacement involves |
|---|---|---|
| 1939 and earlier | 1.5 percent | Ole Hanson era. Often site-built casework with in-frame doors and no consistent reveal; everything is measured individually |
| 1940 to 1969 | 25.6 percent | Face frame boxes, frequently overpainted many times. Openings out of square, so door sizes vary along a single run |
| 1970 to 1979 | 21.7 percent | The largest single band. Partial overlay, often raised panel, on face frames. The most straightforward era to re-door |
| 1980 to 1989 | 19.4 percent | Partial and full overlay mixed, laminate faces common. Edge condition decides whether the box is worth keeping |
| 1990 to 1999 | 10.8 percent | Full overlay becoming standard; cup hinge boring usually reusable |
| 2000 to 2009 | 19.2 percent | Builder packages in Talega, Forster Ranch and Marblehead. Doors are the paint-grade or thermofoil weak point on an otherwise sound box |
| 2010 and later | 1.7 percent | Too new to need doors; occasionally a colour change or an added run to match |
Percentages from the SCAG Pre-Certified Local Housing Data, updated April 2021, prepared for the City of San Clemente's 6th Cycle Housing Element Update, citing American Community Survey 2014-2018 five year estimates. The era commentary is ours.
Two practical conclusions come out of that table. First, the 2000 to 2009 band at 19.2 percent is unusually large for a city of this size and it is the band where doors alone genuinely are the whole answer, because those boxes are twenty years old at most and the door face is the part that has dated or failed. Second, the 25.6 percent of the stock from 1940 to 1969 is where re-doors go wrong, because openings in houses of that age are rarely square and a door order taken off a single sample door produces a run where the reveals drift along the wall. On those kitchens every opening is measured, which is a survey cost rather than a manufacturing one.
When new doors are the whole answer, and when they are not
New doors and fronts are the complete solution when the carcasses are sound, the face frames are square and the layout works. That describes a great many kitchens in the 1980s and 1990s hillside parts of San Clemente, in Rancho San Clemente, Forster Ranch and Marblehead Inland, where the cabinetry was decently built and the only thing that has aged is the door profile and the colour.
They are not the answer when the sink base has swollen, when a face frame has racked so doors will not stay aligned however they are adjusted, or when the complaint is really about layout. A new door does not move a filler strip, does not reach into a dead corner and does not turn a door into a drawer. If those are the problems, the honest route is new cabinetry.
- Check that face frames are square before ordering anything, by measuring the diagonals of a few openings
- Press the sink base deck, because a failed box makes new doors a waste
- Decide the overlay explicitly and write it on the order
- Specify the hinge at the same time as the door, so the boring matches
- For stained doors, insist on a floating panel in any door wider than about a foot
- If only some doors are being replaced, plan for the aged finish on the rest
- Ask whether drawer fronts are adjustable after fitting, because the good answer is yes
If what you want is new doors plus new visible skins on the boxes, that is refacing. If the existing doors are good timber under a tired finish, refinishing keeps them. And if the hardware is what actually bothers you, the hardware page is a much cheaper conversation.